Did you know that your missionary Google account will delete after 90 days – and, with it, all your emails and photos? Don’t let yourself wake up one day to find all your priceless mission memories gone. Trust us – they’re impossible to recover.
Instead, be proactive within the first week of getting home, or, even better, before you step foot in the MTC. In this article, we’ll walk you through the best tips and tricks for saving all that testimony.
How The Church’s Google Account Works
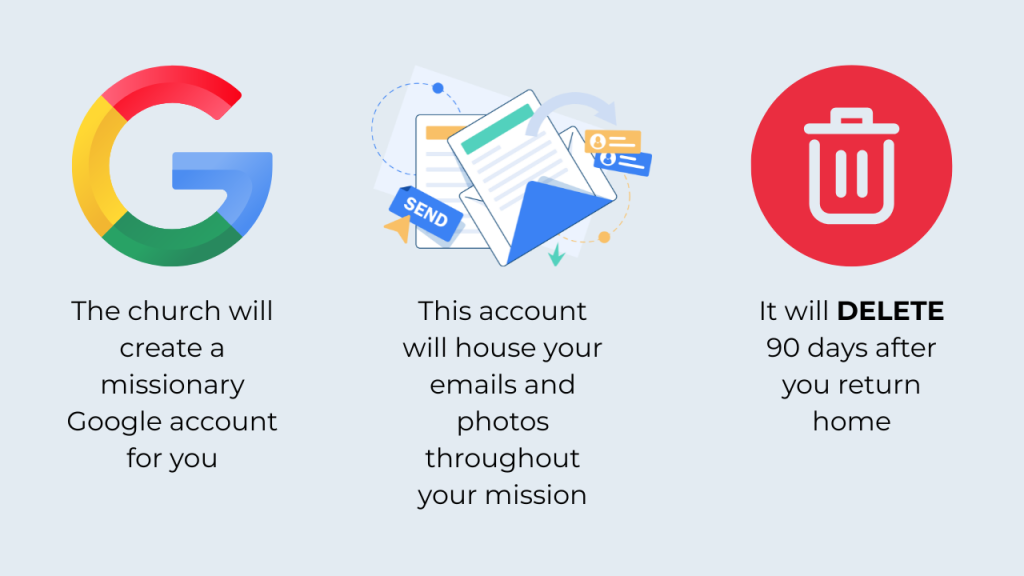
When you approach your mission start date, you should gain information about your missionary Google account through your mission portal. When you start your mission and get a church-loaned Android device, you’ll log into that Google account, and it will house all your photos (if you do it right) and your emails.
This account will be active throughout the duration of your mission, but it will delete 90 days after you come home. Most people don’t get any reminders, so mark day 85 in your calendar! Once it’s gone, it’s gone forever (and we’ve had plenty of people confirm this!)
What You Can Do Before Your Mission Starts (HIGHLY RECOMMEND)
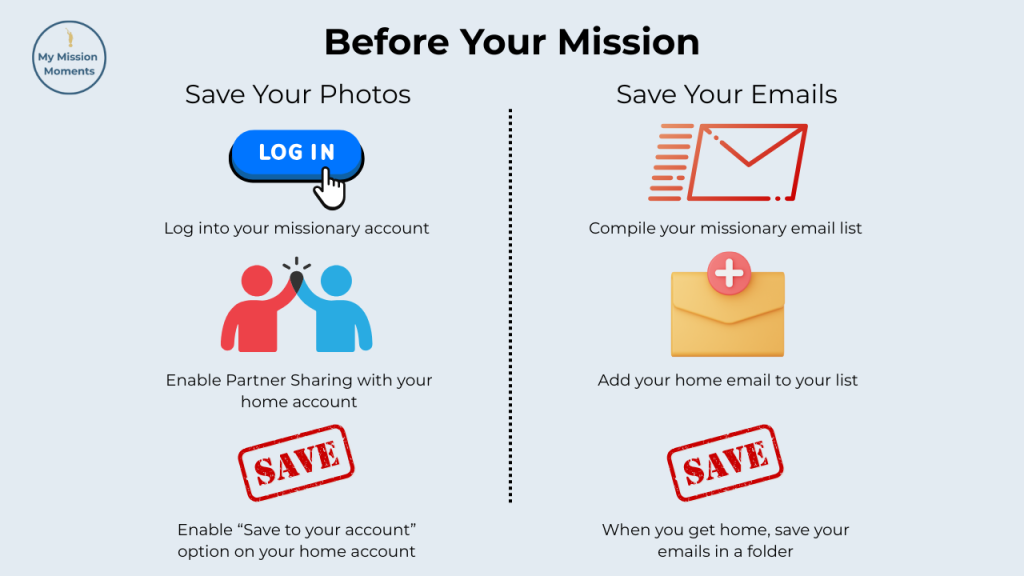
There are a few things that you can do before your mission starts to make the process of saving your memories easier.
When I first got access to my missionary account, I logged into it on a laptop and configured the Google Photos settings to share with my home Google Photos account. The feature is called “Partner Sharing” – here’s a tutorial: Set Up Partner Sharing.
Now, make your life EXTRA EASY, like I did, and enable the “Save to your account” option in partner sharing with your home Google account (you can find this in the partner sharing settings). This way, your mission photos will automatically save throughout, and you won’t have to worry about a thing when you get home. The church could delete your account at any time, and you’re none the wiser, because your photos are already saved!
You can do the same thing with your emails by simply adding your home email address to your email list. Easy.
How To Save Everything AFTER The Mission
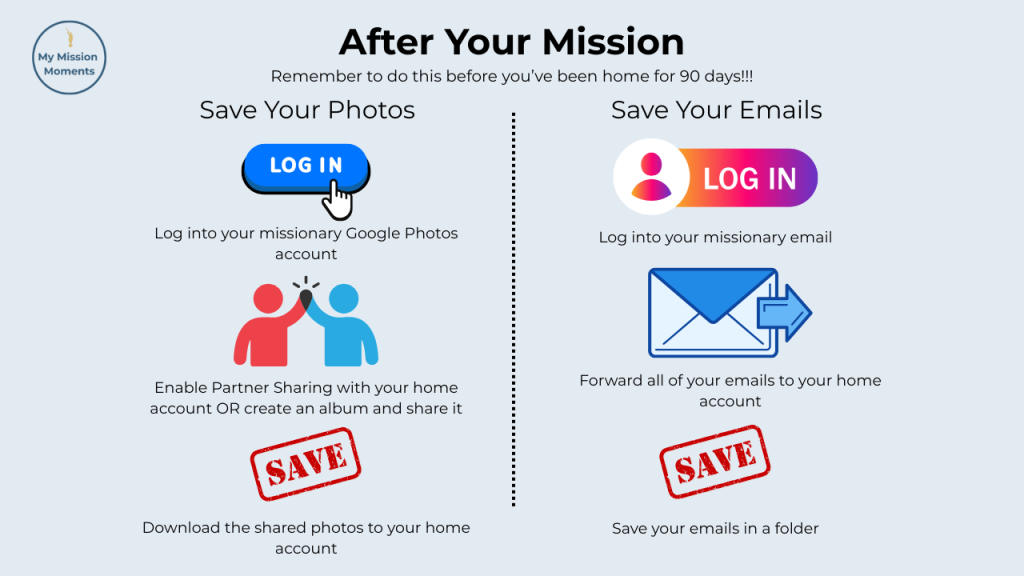
Unfortunately, you can’t go back in time. If you didn’t think to do those steps before your mission, you’ll have to put in just a little more effort now. But don’t be discouraged – it’s still pretty simple.
As long as it’s not post-90-days, you still have access to your missionary account. If you want all your photos saved, you’ll just set up partner sharing with your home device, and download them onto your home Google Photos account. Basically the same steps as what you could have done before your mission.
If you only want to save some of your photos, you can create an album, put in all the photos you want to save, click share, share with your home account, and download them to your home account.
For emails, you can simply log onto your missionary account and forward all of your emails to your home account. Then, save those emails in a folder in your home email. Now, they’re set aside for whenever you want to peruse them!
Save Your Missionary Emails and Photos in a Book
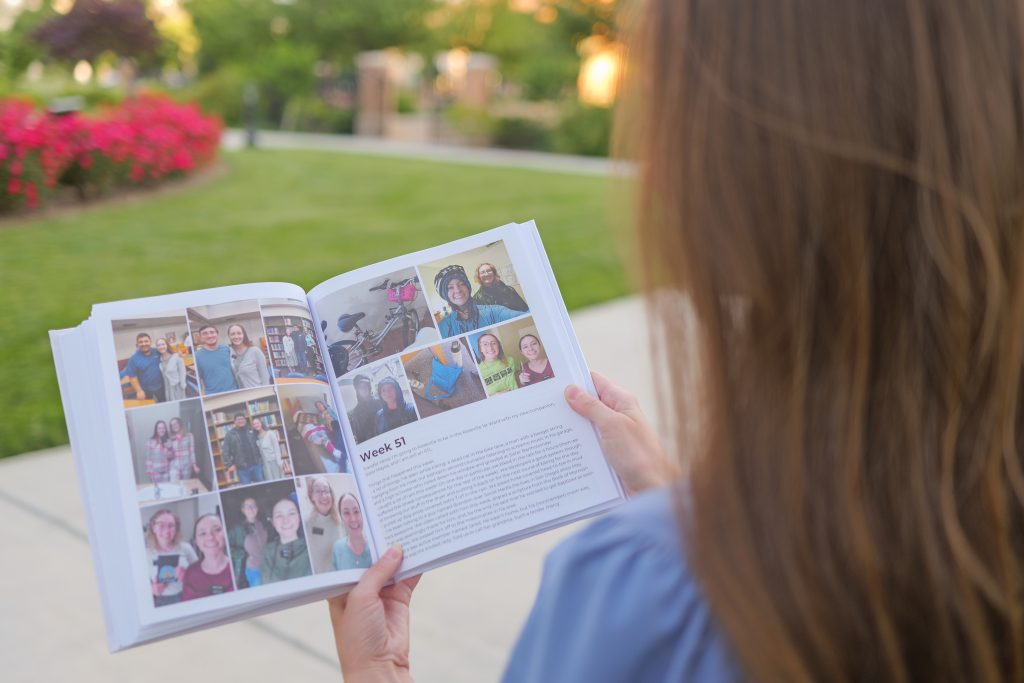
Even better than browsing your emails and photos on a device is having them physically at your fingertips to look through, show your family, and have a keepsake reminder to always remember your experiences. That’s our mission here at My Mission Moments.
We’ve written this step-by-step guide to save your emails in a book – whether through our service, or DIY! Whichever you choose, we want everyone to have the opportunity to remember and share their missions forever. Check it out: How To Create An LDS Missionary Email Book.
Still not sure about us? Look through our FAQ page or send us an email at contact@mymissionmoments.com.